
The importance of including an image in every single post was made clear to me when I launched my first blog. Of course, the very first article offered zero visual interest to any readers that stumbled by that day. The only thing those seven (7) viewers saw was a colorless header and a page of text.
The feedback was obvious: add a picture. Without a quality camera and not wanting to bother with crediting other photographers, I turned to the basic graphic design package already installed on my home PC, PowerPoint. This Microsoft presentation software that most of us have on our computers was a great starting point to produce simple visual anchors that would hopefully lead to more clicks and longer visits. My goal was to efficiently create unique bright images for each post, without cost.
 If you have ever played with PowerPoint you’ll know that as well as text, it handles simple graphic design pretty well. Starting out was like going back to kindergarten for me as I clumsily produced combinations of rectangles, circles, and triangles. With some practice it became easier to layer the available shapes, mix colors, add 3-D effects, and more. I found PowerPoint to be a powerful package for my simple needs, but there are several other cost effective packages available that would be a good fit for blogging.
As I fumbled through the first few weeks of producing images I made lots of mistakes and they were very basic. However, I discovered that this inexperience worked to my advantage. Still a long way from earning my PowerPoint ranger badge, my clumsy designs were more symbolic than sophisticated. Despite their simplistic look I noticed a spike in Facebook referral traffic; the jump was immediate.
 Like fish are attracted to bright shiny lures, Facebook users also seemed to be attracted to colorful symbolic images. Facebook remains the single biggest referrer to Financially Consumed and I credit this to the simple images.
 Step By Step
Open your graphic design application and begin by removing the text boxes, you want to start with a blank page. These steps apply mainly to PowerPoint, but I’m sure you could achieve great results with any platform you have access to.
Add Grid Lines & Ruler. Do this by clicking the view tab, and ensuring the check-boxes are marked. This helps to create an image of the required size. I normally create a 300 pixel square for each article, but you can create images of any size for headers, banners, or even advertisements.
Select Shapes. PowerPoint offers ready made shapes: basic shapes, arrows, flow chart symbols, lines, and others. These can be dropped into the workspace and manipulated to build your picture.
 Add Text Box(s). Choose one or more text boxes to add symbols, letters, and words. The shapes can be typed into directly, but choosing a text box offers far more flexibility when manipulating the look and placement of the words.
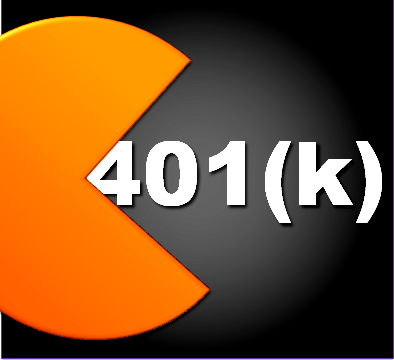
Format. Each shape can accept color, shading, and 3-d effects. Shape borders can be heavily manipulated also. This is the time consuming aspect of graphic design because it takes patience to experiment with the capabilities of your software to find the look you want. The options are infinite. The TV image on the left has several layered shapes using multiple effects to create the desired look.
Save. I prefer to save these files as .PNG for flexibility, but you won’t be able to change these again in PowerPoint. Save also as .PPT if you think you might want to edit the image later.
Open In Paint Shop / Photo Shop. These packages make cropping to the exact size easy. Plus, they offer another level of effects to create your desired look. I often brighten or clarify the colors to help make them pop.
Insert. The finished images can be placed directly into your blog post like any other.
These simple pictures are quick and easy to produce. They’re definitely not going to fit the style of every site, but if you’re tired of sourcing photographs then PowerPoint offers a graphic design alternative for the blogger on a shoestring budget.
STARTING A MONEY MAKING BLOG
I never thought I’d be able to quit my job in 2012 just three years after starting Financial Samurai. But by starting one financial crisis day in 2009, Financial Samurai actually makes more than my entire passive income total that took 15 years to build. If you enjoy writing, creating, connecting with people online, and enjoying more freedom, learn how you can set up a WordPress blog in 15 minutes like this one.
Leverage the 3+ billion internet users and build your brand online. There are professional bloggers now who make way more than bankers, doctors, lawyers, and entrepreneurs while having much more fun, much more freedom, and doing less work. Get started. You never know where the journey will take you!
Updated for 2017 and beyond.


That is pretty cool! I’ll have to see if I can use these tips and tricks in Open Office…. (fingers crossed). :)
Cool Derek, let me know what you think of Open Office.
Neat! Echo Derek’s comment. I haven’t bothered to get Office for Mac. Open Office has some limitations, but I’ll give it a shot. Lately I’ve preferred to look for public domain B&W photos. I’m with you on the visuals. I don’t like to put up an unaccompanied article.
Andrew, LH and I are putting a lot of emphasis on visual appeal on our new bicycle blog, Bike Lane Living. We’re mainly using photographs which makes Flickr a natural addition to the social media reader options.
The Yakezie pool is a pretty good idea though you’d have to have a large enough pool to make it worthwhile. I use Flickr creative commons for many of my photos. Hopefully I’m doing it right :) But, photos / graphics aren’t a huge priority.
You make a great point MB. Photos / images are nice but not a critical priority, I would definitely rank quality information ahead of visual anchors
I use the creative commons route too, but I’m usually able to find something I like.
My problem with graphics is that point you made of “getting it to look like you want it to look” How do I do that, that requires imagination and a 3d mind?
Maybe with practice I could do that, but is the learning curve for us non-artists steep?
The beauty of visual appeal is that simple colorful shapes get as much attention, maybe more, than more complex ones. Think of your image as a Facebook thumbnail in someones newsfeed. All the detail is lost. My most basic creations sometimes got the most attention.
To answer your question. Yes, it takes some practice to produce these quickly.
My instigation to create imagery is because I love to make them. I never even thought to use power point. I’ve never used it before but I’m very curious now to try it out.
I like the idea of a Yakezie photo section. I think it could build quickly if it was simple to upload and download images.
I think Mike & Molly’s House is an excellent example of using images to help define the style of the blog. Your graphic design makes your site unique, and fun to look at.
RE: Flickr Photoshare – Smart idea Sam. This account could be set up very quickly, with access limited to the Yakezie network.
One more thing Molly forgot to mention is if you don’t have photoshop you can crop your image in Picnik. It’s a free online service where you can download your image and make changes to it.
Picnik, that’s great information. My wife purchased Corel paintshop years before I began blogging, definitely not an inexpensive way to crop images.
I usually create the image or take it and then play with the photo to fit the theme of my topic. Like today for example I talked about how my wife won a battle that we were having. I then photoshoped her face in the poster COLOMBIANA. Fun and it takes me 10 minutes if that.
I really like the visual emphasis of your blog Jai. Are your photography skills self-taught did you attend photoshop Ninja school?
Great idea – I have been trying to create more stuff with photoshop and this might be just what I need! Thanks.
I’ve mentioned this before Corey, but I think your logo is pretty cool. Did you create that on PowerPoint?
Nope – a little bit of photoshop, but it would be pretty easy to do on powerpoint. Thanks for the great tip – seriously! I have re-done some of the headers on the websites that I own thanks to your great tip! I literally just spent the last hour re-designing. Amazing tool! Thanks so much for sharing.
It’s a great idea to use Power Point (I wouldn’t have thought about that!) From your examples in this post, you’re quite a pro now. And you’re right, adding images to posts makes them pop out more. For Little House, I use a lot of “found” images but have been lagging on photo credits. I need to get better at adding images to my posts. ;)
No no no, I’m definitely not a pro, far from it. In fact, you should be the one to have written this post ;)
I honestly had no idea you were just using PowerPoint, Hunter! I am impressed! For me, I just use Flickr Creative Commons. It’s the fastest for me, and I can get some pretty decent images on there.
Thanks Jeffrery. I’ve noticed that your posts have large images, looks sharp. Are you allowed to alter images from Flickr CC, by adding text, for example?
I think depending on the CC lisc used by the photo taker on flicker, you can alter. Some you cant though.
Im so glad you did this tutorial. Thanks!
No worries Marissa. It’s light on details, but there are several packages that are cheap and easy to learn on the market.
I have no patience for learning to use photoshop, powerpoint (to design graphics anyway) or other programs. Besides, I don’t have the most creative mind when it comes to imagery so I’m not sure what use it would be anyway.
I, too learned that it is important to have something other than text in a post to not only make it easier to read, but also to grab a readers attention. I go mostly with flickr but of course there are some times when it is difficult to find the image you need, so doing a google image search helps. When there is a person to attribute the credit to, I do. In the past, I was very lax at doing this, but now I am more aware, and make more of an effort to give the credit where it is due.
This is definitely not for everyone Eric, I appreciate your honest opinion. No imagination? I don’t believe it. It takes creativity to produce a blog every day.
Just not any imagination for imagery or creating graphics at least. I can’t even do photos right, as evidenced by my post today about organization. When you click on the photos, they open up giant-sized!
This is an awesome idea, I had no idea this was powerpoint as well. I used to try to find images for all my posts, but I found out that it took a long time and I wasnt all that big of a fan of doing it, so I stopped. No one really seemed to notice.
I’d be interested in having a yakezie picture repository though.
The awesome header image on SLB is a powerful visual anchor!
This is great. It’s so simple that it didn’t even cross my mind! Thanks for helping me to think back to the basics!
The images really do only have to be very basic. I’m sure just a solid color block attached to a Facebook story would drive more traffic than nothing at all.
This is a good post on improvising and teaching oneself a skill. I started out with Paint back in the day, lol. I eventually upgraded to Photoshop. Recently I had to replace my hard drive and my Photoshop disks were at work (Adobe allows one user to use PS on two computers so I have mine installed a second time on my home PC) and I really needed to resize/edit a photo so I went googling and came across http://pixlr.com/editor/ which is very similar to Photoshop. It is easy to use and it is free! They also have a phone app version. Also I wanted to say I thought all the pictures in this post look great! I also love the idea of creating a section for Yakezie to upload photos to share with others.
Thanks Miss. A. Pixlr, another resource, thanks for sharing.
Great tips Hunter! I’m a fan of photoshop, but for those just starting out – Word and Powerpoint are great ways to create images. Also, great idea for having an images section in the Yakezie! I’d participate in that for sure!
Word! Yes, it has similar capability and layout to PowerPoint. I didn’t even realize.
Great post and thanks for the idea! I might just create a brand image with it. Question…do bloggers get in trouble for using images from flickr (since some recommended using it)? Thanks!
I need anyone with CC experience to answer this one, please. Thanks Taline.
Awesome post. I used sxc.hu but used to be a graphic designer so should make more of my own images. I reckon just having a camera laying around is worthwhile too.
That’s a great tip. Since LH and I launched Bike Lane Living I’ve been carrying a camera every time I leave the house. There’s an endless demand for online content, and I need to stop photographing my own bike…it’s getting kind of old.
I’ll try this out over the weekend. I need more graphics. :) Good post.
I’ll send you some bike pictures too.
Cool tips. I love powerpoint and I’m kind of ready to expand beyond flickr creative commons, especially for the cool smart art in powerpoint.
This is a great idea. I never thought about using graphics. I always use photos. I might just have to give this a try.
I find a picture to be an important part of ach post. Beyond that, Facebook has studies that posts with a picture are 10x more likely to be clicked than post without. I am trying to use more of my own art or basics that I create.
Creative commons, baby. Flickr, or wikimedia. Each image specifies how to credit it. Couldn’t be simpler!
I learned a long time ago that I am better in selection vs. creation. I use Flickr creative commons. I definitely agree with the concept of a graphic is attention getting.
Great tips Hunter and love your art designs. Didn’t know you were a PowerPoint and FaceBook guru! I’m not creative so I enhance my posts with YouTube videos.
Very very cool. I have been looking for ways to add more images. Never thought of using Power point!
This is exactly what I needed right now, my goal this weekend is to get a header image on my blog. I am making more of an effort to add a picture to every post but can always do better. Thanks for the info!
Oh, here’s another suggestion for images in posts – if you are an Amazon affiliate link to a product which corresponds to your topic. Free image and the chance your readers will click through, buy and you earn affiliate income.
Thanks for the tip! My blog is still very young, and while I didn’t expect much traffic early on, I thought I’d be getting more than I’m seeing. I’ll try this image route for those posts where I can’t find an appropriate image elsewhere and see what it does.
Interesting idea, and it was cool too see how you progressed as you practiced more and more. I’ve used a few different free picture databases for any time I’ve needed pictures. It takes a while to build up a decent library, but once you’ve got it, you’re pretty much set with all royalty-free images.
This is a pretty cool and quick way for me to get images for my content. After all – even when using photos.com or some other paid service, it can be difficult to find the EXACT picture that you’re looking for. The hard part is, I’m not necessarily in an area where I can photograph anything terribly interesting (or maybe I am not thinking far enough outside of the box) and my drawing skills are virtually non-existent.
I did, however, use PAINT.NET to create the current logo on my site. I love text-based logos, etc. Photoshop is where it can get a bit tricky for me, though…
This is a great idea. Have to give it a try. Thanks for sharing this.
This is a great idea. I went back and looked through my blog and realized that I include almost no images in my posts and when I do include images I’m always concerned with copyright laws.
You know, this is one of those no brainer suggestions! Thanks for the idea!
You know, this is one of those no brainer suggestions! Thanks for the idea; I think I’ll got to this later in the week!
This is great! I didn’t know it was so (seemingly) easy … I’ll have to try it!
I as well as my buddies happened to be checking out the best things found on the blog then developed an awful suspicion I had not expressed respect to the web site owner for those strategies.
I mostly use Zemanta these days, but I really like these sort of simple graphics. As far as overall graphics design goes though that is not my forte… haha.
I use Zemanta as well, and it’s the best thing I’ve ever found. I do have to check for broken links every once in a while though. I can do photoshop graphics and more, but I’d rather spend my time on my writing.